 English
 Español
  Português
  русский
  Français
  日本語
日本語  Deutsch
  tiếng Việt
  Italiano
  Nederlands
  ภาษาไทย
  Polski
  한국어
한국어  Svenska
  magyar
  Malay
Malay  বাংলা ভাষার
  Dansk
Dansk  Suomi
Suomi  हिन्दी
  Pilipino
  Türkçe
  Gaeilge
  العربية
  Indonesia
  Norsk
Norsk  تمل
تمل  český
český  ελληνικά
  український
  Javanese
  فارسی
فارسی  தமிழ்
தமிழ்  తెలుగు
  नेपाली
  Burmese
  български
  ລາວ
ລາວ  Latine
  Қазақша
  Euskal
  Azərbaycan
  Slovenský jazyk
  Македонски
  Lietuvos
  Eesti Keel
  Română
  Slovenski
  मराठी
मराठी  Srpski језик


ウェーハバタフライバルブの取り付け手順
2021-05-02
クリップの正しい取り付けバタフライバルブ is related to the sealing degree of the バタフライバルブ and whether it will leak, including the safety in the working condition. The user should understand the installation process.
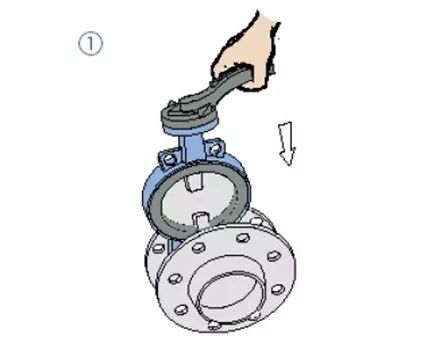
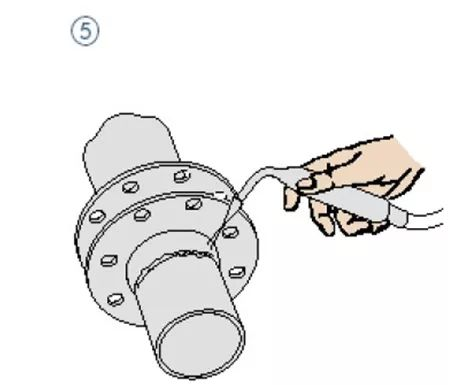
1.図に示すように、事前に取り付けられた2つのフランジの間にバルブを配置し、ボルト穴のきちんとした位置合わせに注意してください。
2. 4組のボルトとナットをフランジ穴に静かに挿入し、ナットをわずかに締めてフランジ表面の平坦度を修正します。
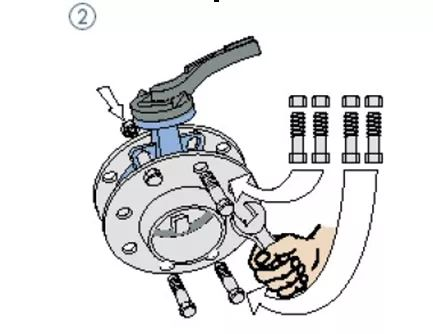
3.フランジはスポット溶接によってパイプに固定されます。
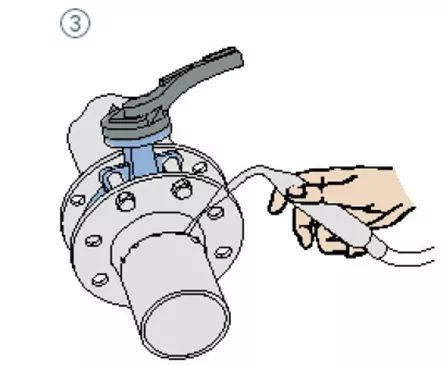
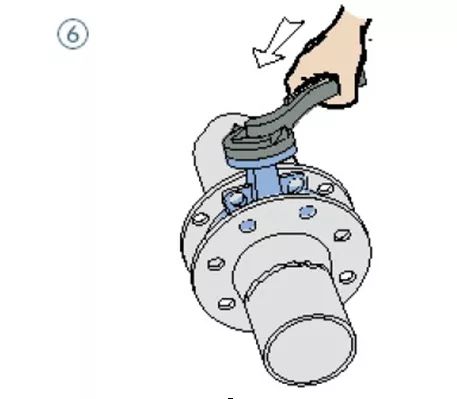
4.バルブを取り外します。
5.フランジは完全に溶接され、パイプに固定されています。
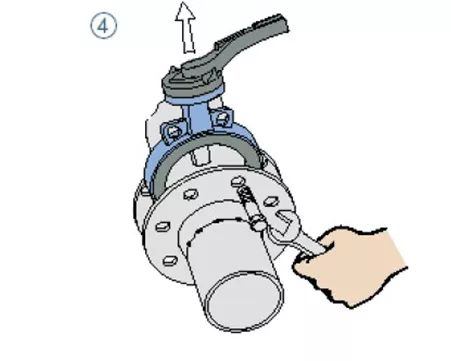
6.溶接部が冷却された後、バルブを取り付けます。バルブが損傷するのを防ぐために、バルブのフランジに十分なスペースがあることを確認し、バルブプレートに特定の開口部があることを確認します。
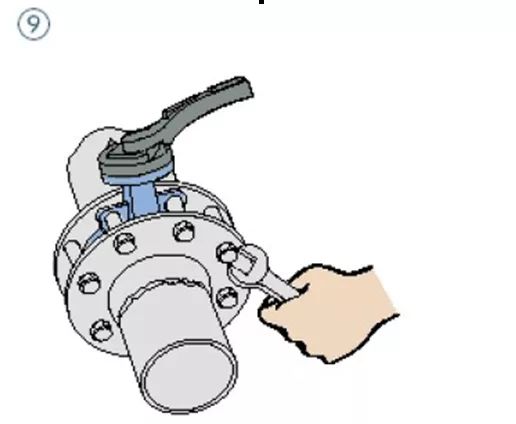
7.バルブの位置を修正し、4対のボルトを締めます。
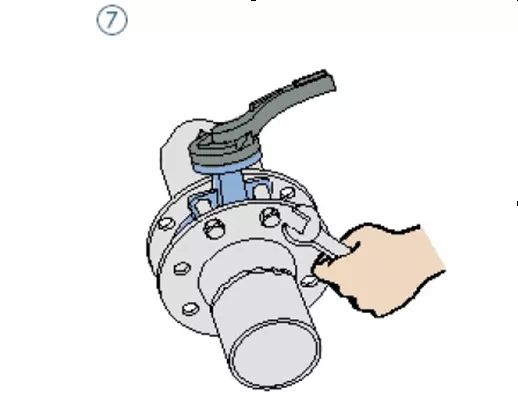
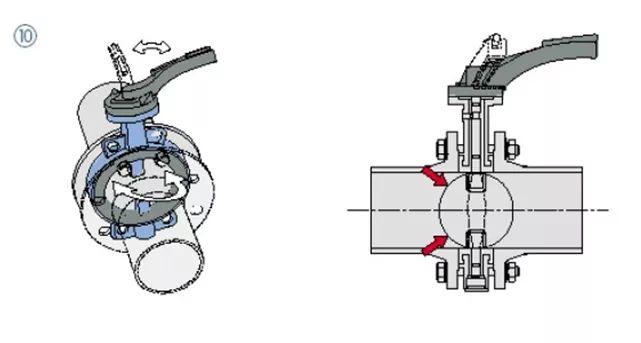
8.バルブを開いて、バルブプレートが自由に開閉できることを確認してから、バルブプレートを少し開きます。
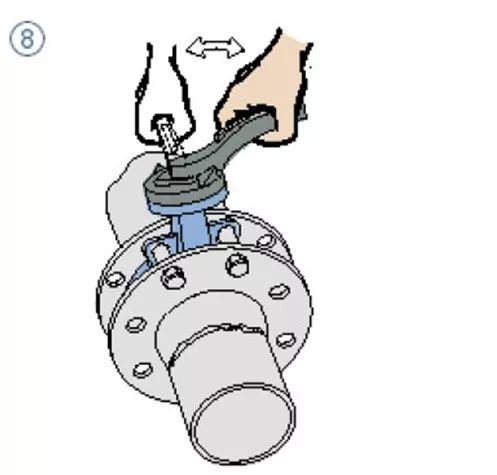
9.すべてのナットを均等に交差して締めます。
10.バルブが自由に開閉できることを再確認します。注:バルブプレートがパイプに触れないように注意してください。
The installation of the clip type バタフライバルブ must be placed flat before installation. Remember not to bump at will. After pulling it to the length of installation, the clip type バタフライバルブ can not be disassembled at will without special permission in the field pipeline design. At the same time, the clip on バタフライバルブ任意の位置に取り付けることができますが、クリップを取り付けた後バタフライバルブ完了し、バタフライバルブ線に沿って配置する必要があり、クリップのサポートが行われますバタフライバルブ。サポートが行われた後は、使用時にサポートを削除することは固く禁じられています。


We use cookies to offer you a better browsing experience, analyze site traffic and personalize content. By using this site, you agree to our use of cookies.
Privacy Policy